Using SEO to Build Authority and Traffic

This is a guest post by Jeff Gross. If you want to guest post on this blog, check out the guest post guidelines.

If you are putting content on your blog to build traffic and authority, SEO needs to be calculated into your effort. It does not matter if you put out 150 word blurbs on social media sites, full websites, or blog posting. SEO is the primary way the usefulness of information posted is interpreted. Therefore, it is logical to conclude that anyone wanting to be found would want to enable search engines to make that interpretation easy.

seo-for-blogs

The Finer Points of Blog Content SEO
Many of the tactics from building SEO friendly websites hold true on a blog. Appropriate use of keywords will provide the markers that spiders need to accurately interpret the work. A blog post that is overly long will actually be more of a hindrance than a help. There ends up being too much other text that ends up getting into the mix that the spiders can interpret as relevant even if it is not. Other points to consider are…

400-500 words is a good target length. Readers are not interested in encyclopedic blog posts. If the subject is bigger than that, simply turn it into a multi-part series.

Appropriate density of any keyword falls between 2% and 3%. Try to avoid saturating the text with buzzwords or industry-speak to broaden your appeal and keep the text readable.

Your title needs to command attention while being descriptive. It should also include keywords relevant to the text. The first sentence is important in that regard. It should also contain any keywords important to the text.

Blogging software packages will often allow you to add relevant tags to a piece of work. This is useful for using additional terms without saturating the work. For example, how would a blogger who doesn’t know anything about SEO locate this post? They may search up a phrase like “how do I get a bigger audience for my blog?” Even though terms like “bigger audience” aren’t used in the text, you can still aim towards that individual through appropriate tags.

The Quest for Greater Authority
The most useful goal you can pursue for your blog is establishing your authority. Prove your blog is giving good information and it will take hold and spread from there. Easier said then done though, right? Any good approach is going to take time. However we can hasten that process by keeping a few things in mind.

If you post junk posts, that’s how your blog will be viewed. Your blog should be used to demonstrate your unique perspective on the relevant interest. A writer that does not have the time to sit down and proof-read their work, spell-check, and make sure it’s readable will not be getting their work read. If you do not have that kind of time, take advantage of a ghost-writing company to generate solid work for you.

Depart from how the rest of the world is portraying a topic. Sometimes, it’s impossible to do. However, when you can, you want to take advantage of your unique experience, perspective, and knowledge to make your work stand out from the crowd. No one is going to take the time to read the piece if it is just a rehash of 50 other posts. Huge blocks of text are an instant turn off to readers. They will close the window.

A blog is one of the greatest marketing tools that is available at the moment. It is a great way to create a personal, memorable experience between your business and a customer that is often lacking on the internet. Be sure to keep SEO in mind while you flesh out your strategy to build traffic and authority to your blog.

Author’s Bio
Jeff is a professional internet marketing and blogging consultant. He writes mostly about blogging, internet marketing, Pay Per Click Strategies and Search Engine Optimization techniques and best practices. Jeff is also a consultant and content contributor for NY condominiums community.

How Do I Preview My Site Before Updating DNS?

Keith,
Removing: Date of Publishing the Article

Q: How Do I access my files on the new server ?
I’ve recently purchased hosting from HostGator and have transferred all my files to new servers. I want to preview it and make changes before letting it live to my audience. Is it possible? If yes, how can I do that ?

Yes, it’s absolutely possible to preview and make changes to it before making it live to general public.

Here are the simple steps:
Usually computers look at the IP in the local host file before looking into the actual DNS( Domain Name System ).
So make changes to this simple file on your computer and trick the computer!

If you are using Windows XP or Windows 7 Operating System, then goto this location, to locate the ‘host’ file: c:\windows\system32\drivers\etc\hosts
(Ofcourse if you have installed your OS on a different drive, then the path differs accordingly.)

Open the host file in a simple text editor.

The content looks something like this:

# Copyright (c) 1993-2009 Microsoft Corp.
#
# This is a sample HOSTS file used by Microsoft TCP/IP for Windows.
#
# This file contains the mappings of IP addresses to host names. Each
# entry should be kept on an individual line. The IP address should
# be placed in the first column followed by the corresponding host name.
# The IP address and the host name should be separated by at least one
# space.
#
# Additionally, comments (such as these) may be inserted on individual
# lines or following the machine name denoted by a ‘#’ symbol.
#
# For example:
#
# 102.54.94.97 rhino.acme.com # source server
# 38.25.63.10 x.acme.com # x client host
# localhost name resolution is handled within DNS itself.
# 127.0.0.1 localhost
# ::1 localhost

Now get the new Dedicated IP Address of your server/host from your new hosting provider.
Usually it will be present inside the cpanel.

Assume that new dedicated IP is 165.100.98.10 for www.yourdomain.com

Now: add this line of code to your host file.

165.100.98.10 yourdomain.com www.yourdomain.com

Now your host file looks something like this:

# Copyright (c) 1993-2009 Microsoft Corp.
#
# This is a sample HOSTS file used by Microsoft TCP/IP for Windows.
#
# This file contains the mappings of IP addresses to host names. Each
# entry should be kept on an individual line. The IP address should
# be placed in the first column followed by the corresponding host name.
# The IP address and the host name should be separated by at least one
# space.
#
# Additionally, comments (such as these) may be inserted on individual
# lines or following the machine name denoted by a ‘#’ symbol.
#
# For example:
#
# 102.54.94.97 rhino.acme.com # source server
# 38.25.63.10 x.acme.com # x client host
# localhost name resolution is handled within DNS itself.
# 127.0.0.1 localhost
# ::1 localhost
165.100.98.10 yourdomain.com www.yourdomain.com

now restart the browser. If it doesn’t work, then it’s due to the cache.

To clear the cache use these dos commands:
Goto your command prompt.
type “ipconfig /flushdns” (without quote).

Now restart your browser and visit your site.

Finally:
Once you make changes and change your original DSN to point it to your new server, then make sure to delete the line of code you added to your local ‘host‘ file.

bbpress(plugin) Theme Compatibility

There are many threads on bbpress forum where people are almost frustrated with the problem of making their theme work with the new bbpress plugin version.

Particularly, they have this problem with making a theme, child-theme and applying it to the forum.

Ex: Your blog has sidebar and you don’t want to have sidebar in your forum.

I had the same problem, and solved it after trying it for a long time. Now I feel like, why the hell did I spend so much time on this simple thing 🙂

bbpress-logo

Without much delay: In this example I’ll illustrate by keeping the official “bbPress (Twenty Ten)” theme in mind, which is present in /wp-content/plugins/bbpress/bbp-themes/bbp-twentyten folder by default when you install the bbpress plugin.

1. Move twentyten theme from /wp-content/plugins/bbpress/bbp-themes/ to /wp-content/themes/.
Note: You can rename the folder with any name you like.

2. Now get into twentyten theme and edit style.css file. Add Template: yourWordpressThemeFolderName (yes add the folder name of your present wordpress theme) to your style.css files comment section, as shown below.

If your WordPress theme name is MyTheme. You have to add Template: MyTheme to style.css file of twentyten bbpress theme.

/**
* Theme Name: bbPress (Twenty Ten)
* Theme URI: http://bbpress.org
* Description: Adds bbPress forums to the Twenty Ten theme
* Author: WordPress and bbPress teams
* Version: 1.2
* Tags: bbpress, black, blue, white, two-columns, fixed-width, custom-header, custom-background, threaded-comments, sticky-post, translation-ready, microformats, rtl-language-support, editor-style
* Template: MyTheme
*
**
*
* This file intentionally left blank. Styles are enqueued in functions.php
*
* 1 – ./css/bbpress.css
*
**/

3. Now you have made the twentyten theme a child theme of your present WordPress theme.
4. Now log into your WordPress dashboard. Goto Appearance, and activate the child-theme.

To remove the sidebar:
Goto the child theme, inside that bbpress folder and comment these line of code /* < ?php get_sidebar(); ?> */ in page-front-forums.php and page-front-topics.php files.

If this method does not work, then create a file called sidebar.php and drop it inside your main theme folder. sidebar.php must be blank.

Now Reload your forum :p

Enhance your Blogging Experience with Select Bowser Add-ons and Plugins

This is a guest post by Nadia Jones. If you want to guest post on this blog, check out the guest post guidelines.

Bloggers know that running a blog is not a simple task: it takes a lot of time and effort to ensure that your blog is constantly updated with valuable and unique content and that it’s aesthetically pleasing—aesthetics play a huge role in attracting a strong audience; and as many bloggers may already know, without a strong audience it’s very difficult to earn revenue from your blog(s). But there are certain web browser “add-ons” that can simplify the way you go about running your blog, can help you appear higher in search engine rankings so that you increase your traffic, and can even make the blogging experience more engaging for your readers—and the best part? They’re all free. To learn what these add-ons are, continue reading below.

1. ScribeFire Blog Editor:

scribefire

This add-on, which is designed to “fire up your blogging,” acts as the ultimate organizational tool to maintain your blog(s)—it allows users to post, edit, add tags, write notes and save post drafts all from a designated central area. It even allows users to add photos to your blog(s) by simply dragging and dropping images from your desktop –no need to upload or copy and paste any links. The add-on is available for most of the major web browsers, including Chrome, Firefox and Safari and supports most major blog platforms, including WordPress, Blogger, TypePad, Windows Live Spaces, and Tumblr just to name a few.

2. Zemanata:

zemanata

One of the easiest ways to gain trust from your readers is to post content that is backed by authoritative and reliable sources. This add-on is a convenient tool that simultaneously formulates a list of relatable links, tags and spam-free news articles and supporting images as you type your posts—you can even filter the results to find copyright free content. This way you don’t have to waste precious time scouring search engines to find what you are looking for. This add-on also supports most major blog platforms, including WordPress, Blogger, and Tumblr and works on most of the major web browsers, including Chrome, Firefox and Safari.

3. All-in-One SEO Pack (plugin):

all-in-one-seo-pack

If you decide to only download one add-on designed to improve search engine rankings, this is “the” add-on to have—this free extension helps you do pretty much everything: it automatically generates Meta descriptions and helps you generate keywords; it helps you create titles for the best optimization; it gives you suggestions so that you can create the best page navigation links and canonical URLs; and it even helps you avoid posting duplicate content which can get you in all sorts of trouble with search engines (your site can get suspended and you might just get sued for copyright infringement). And with more than 8 million downloads to date, the plug-in has proven to be effective time and time again. This add-on is unfortunately only available for WordPress users.

4. Tin Eye:

tineye

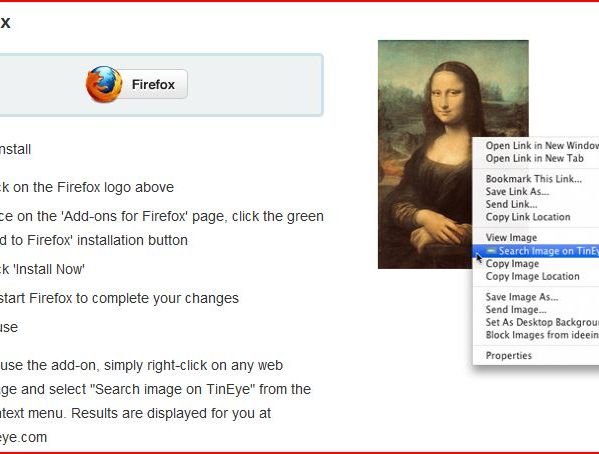
This add-on is the perfect addition for bloggers who want to improve the quality of their photos. This is how it works: the add-on uses “reverse image” software to locate either the original source of an image you found so that you can give proper credit or check its copyright; or you can upload a poor quality photo to find a higher resolution alternative. This add-on supports all major web browsers.

5. Broken Link Checker (plugin):

broken-link-checker

Ask any SEO expert and they will inform you that one of the major no-no’s is containing broken links in your blog posts. Not only will search engines not file and store pages with broken links (which ultimately harms and weakens your rankings), but your readers may lose trust in your site all together—how reliable do you seem linking to sources that lead to dead, 404 sites? But even if you’re careful about writing the correct HTML coding sometimes sites just expire. Here’s where this particular plug-in comes to the rescue: it monitors all of the content in your blog, including new and old, and regularly checks for broken links found in posts and comments so that you can immediately correct the issue. This add-on is only available for WordPress users.

6. Outbrain Ratings:

outbrain

This add-on, which is technically more of a widget, is great because not only does it allow users to rate your posts as the title suggests (which can help your audience be more engaged with your blog), but it also can suggest other posts that are related to the one they are currently reading—this adds traffic and increases page views to both new and old articles/posts. Like all the others, this widget supports all major blog platforms and web browsers.

7. Translate Gadget:

googletranslate

An excellent way to increase your number of followers is to make yourself accessible to non-English speakers. In order to do this, all you need to do is simply download this add-on which allows your foreign readers to translate your blog content to their native tongue.

8. Google Analytics (plugin):

googleanalytics

Lastly, there is no point in trying to make your blog the most recognizable blog the internet has to offer if you don’t even know if people are visiting your site. With this plug-in however, you will be able to monitor and keep track of all your web traffic so that you can know if all of your hard work is paying off. This plug-in will not only allow you to see outbound clicks and page views associated with each author and category, but it will also give you some great insight into your readers’ behavior—it can show you what kind of content your audience favors and is more likely to read so that you can cater to them. Available for WordPress users.

Author Bio:
This is a guest post by Nadia Jones who blogs at online college about education, college, student, teacher, money saving, movie related topics. You can reach her at nadia.jones5 @ gmail.com.

7 Tips To Put Your Video Blog Ahead Of The Competition

This is a guest post by Andy Havard. If you want to guest post on this blog, check out the guest post guidelines.

Video blogging is one of the most popular uses of online video on the web right now. So how do you make your video blog stand out from the crowd? This article outlines the 7 essential tips for putting your video blog ahead of the competition:

video-tips

1. Understand What A Video Blog Is
A video blog (or “Vlog”) is just a video representation of your everyday blog. Users read particular blogs because they either enjoy the personality behind the content, or they’re interested in the topic being discussed or because they can relate to article. Your video blog should do exactly the same.

2. Be Engaging & Accessible
Much like in the blogosphere, viewers don’t want to watch video content they can’t connect with. Here are a few pointers to establish real engagement with your audience; ask questions that users can respond to, discuss issues and subjects that tie in with your topic niche, and always try to address your audience in a way a friendly and familiar way.

3. Be Useful & Up To Date
When exciting news hits the web, Internet users will be undoubtedly searching for it. If your vlog is constantly up to date with topical news in your niche you’ll stand a better chance of getting users to check out your video blog.

4. Be Personal & Human
Blogs by nature convey personality through the uses of playful text and images, and your vlog should do the same. The benefit of video blogs is that they allow your audience to see you, hear you and relate to how your body language and on-screen actions. By letting your audience see you in this way will give your vlog an essential personal feel to it. Always be yourself, trying to be something you’re not will be surprisingly obvious to viewers and they won’t like you for it.

5. Check Out Other Vlogs
No one becomes a master of video blogging overnight. It takes time, practice and dedication to become comfortable and confident on camera. By watching other vlogs and seeing how other users have changed from their early episodes, you’ll pick up some handy tips and gain confidence in your early performances. Learning from other users will help you be able to make sure your vlog tick all of the right boxes.

6. Always Aim To Inform, Educate & Entertain
There are 3 essential golden rules when it comes to creating video content these are to inform, educate and entertain your audience. If you are able to hit these 3 areas on the head you’ll be well on your way to creating a great video production. It’s quite a task to tick all 3 boxes, but by hitting at least one or two each time you create a video will really help to benefit your video blog’s.

7. Give It All You’ve Got
The more time and effort you can put into each and every video blog the better you can make them. Spending time script writing, planning your shot, filming your vlog, editing it and producing it will really put your video blog ahead of the pack. You’d be surprised how many vlogs are slap-dash affairs and their creators wonder why they don’t get viewed or shared. Always give it everything you’ve got no matter if it’s your first vlog or your hundredth.

Summary
Just like in the blogging world there’s tough competition to battle out there, but by taking on board these pointers your video blog will stand a much greater chance of succeeding online.

Andy Havard is a Marketing Executive at Skeleton Productions, a UK based Internet video production company.

Removing: Date of Publishing the Article

Gina,
Removing: Date of Publishing the Article

Q: How to eliminate the dates from my posts…
It is the Twenty Ten Theme on wordpress. I need to remove it from my homepage as well as from the single posts.

To remove or not to remove the date and time from the blog posts is a different issue and we will cover that in the later part of this article.
First lets see how to remove the date being displayed on your theme.

Caution:
Make sure to take a backup of your theme before trying this.

General Themes:
In general, most themes would have < ?php the_time(); ?> in single.php or post.php file, present in your theme directory.
Usually the path is: /wp-content/themes/themeName

Log into your WordPress blog: Click on Edit under Appearance menu.
Click on single.php or post.php file to edit it.

remove that code or comment it out, save the file and refresh your webpage. Make sure to clear your blogs cache if you have installed any caching plugin.

For Twenty Ten Theme
Twenty Ten theme uses a function call < ?php twentyten_posted_on(); ?> to display post date as well as author name.
So removing it from your single.php file would even remove “posted by author” info also.

So, you need to remove the date part from the functions.php file directly.

Log into your WordPress blog: Click on Edit under Appearance menu.
Click on functions.php file to edit it.

Scroll down to find this line of code:


printf( __( '<span class="%1$s">Posted on</span> %2$s 
<span class="meta-sep">by</span> %3$s', 'twentyten' ),

Now remove the code which is responsible for generating “Posted on ” info. Now the code must look like:


printf( __( ' <span class="meta-sep">by</span> %3$s', 'twentyten' ),

Save the file and refresh your blog.

If you followed everything correctly, the Posted on (post_date) will now be removed.

date-scroller

To Remove or Not To Remove ?
People searching for the content often get frustrated to go through long enough only to know that its a old and out dated information 🙁
Sometimes they need to scroll down to the comment section to see the date of the first comment, to roughly know the post date.

If it’s a timeless content, then it’s always fine, but what if you are a news site and some kind of gossip site where knowing the post date might be important for the user.
In such cases, it’s not advisable to remove the date of publishing the article.

I have faced problems too.. I usually visit application development sites and read and try the coding so long only to know that the core software the post is talking about is years old and it doesn’t work any more 🙁
Such development site even fail to mention the software version etc details.

Advantages to the webmaster:
People coming to the site may think the content as still fresh and will continue reading.
These people are mainly the visitors coming from search engines, so he gets the advantage of getting more organic traffic. Google Adsense ads likes organic traffic! Once they know that this is not something they were looking for, they will start looking around and may click on a ad $

My Personal Take:
My advice would be to include the date, if you are writing a development blog or a news site where the articles are more or less time sensitive.
On the other hand, if you are writing timeless articles: you can well remove the date and time of posting the article.

These are my views. What you people think ?

How My Freelance Work Got Ruined and How YOU Can Avoid It

I started blogging as my hobby, and till date I continue to blog only as hobby. I never had the intention to live and lead my life out of the income generated by this blog! That’s the main reason why I can provide unbiased information and opinion about any topic and any product.

ThumbsUp-ThumbsDown

Freelance Work Life:
I started freelance work accidentally. Some one asked me for help, I did it for free. I helped some more people like this for free. Later on, these people started referring their friends and slowly I started getting clients who were willing to pay me. I started charging modest fee to all my initial clients. They liked my work and they eventually started referring their friends, hence it started making me some serious $cash$. So from here, making money online started making some real sense!

Need for Some Improvements:
Since I started getting good income, I thought – why not invest more time and money into this ? So thought of shifting the work place.

It wasn’t that big move: I shifted from a congested room to a more spacious room inside my home. But moving around things took lot of effort, and time to convince my mom.

My clients were happy for me and they extended the deadlines of project by 2 days 😉

Actual disaster:
It took some more days as we had to get new earthing wires etc and drill the room wall for new electric switches etc.

Finally when everything seemed great, my Internet connection got disconnected 🙁 🙁

It was a regular thing with my old ISP, so decided to even fix that. So I ordered for India’s leading ISP.

Once I made my mind to switch to Indian’s no1 broadband provider(i.e., BSNL), they told me to give me the service in 5 days after I apply for it. So I went ahead, disconnected Reliance Broadband and applied for BSNL broadband. I was excited to have the highspeed internet in my new work place. But it never came 🙁 I called their customer care and they sent me my cheque back informing me that there was an error while processing my application and I will have to do the whole process once again!

I went the same day and applied, after 8 days they promptly came to my home installed the landline and the next morning another person came with new WiFi modem and configured it.
It was great feel to get back and tell “hi” to all my internet buddies and to my clients. I was sure they would support me when they know what went through in my life.

Lot of Mails To Respond:
Eagerly I opened my email and to my disappointment there were a lot of new emails I had to reply to 🙁
Most of the mails were from my clients and they were asking whether everything is ok with me and my family and why am I not replying. I started explaining them via email, and I replied to a lot of them, forgetting some common sense TOS of Google App(my email provider). I had(probably) exceeded the limit of emails that I was supposed to send in a day. So my account got blocked 🙁 🙁 🙁
I started feeling sick for staying awake all day-night, and replying everyone.

Now I was totally pissed off knowing that my clients would be pissed off by me.

I tried all means to contact Google regarding this. My account was blocked more than a week and thankfully restored some days back. I had to reconfigure CName etc with my domain registrar, so not sure what exactly had went wrong.

Now the real challenge: from where to start replying to my emails. There were more and more replies and I had to write this post(finally).

Lessons learnt:
1. Have contact with your clients in more than just one place: I have created Technotip Page on Facebook. Please make sure to join and share with your friends.
2. Take only one or two jobs at a time. Don’t give assured dates to more than 2 or 3 clients.
3. Accept only those works which you are expert at. And don’t accept works which will take time and you need to figure out a lot to start the work.
4. Have some contract: Over years I have seen clients who pay once and keep asking for modifications every month. This actually put me into immense pressure.
5. Have some kind of backup plan.
6. Spread your income. Don’t keep all the eggs in a single basket.
7. Stop taking minor fixes job. These minor fixes take most of my time. So I will be mostly concentrating on my major freelance works, like blog migration, app development etc.
8. Will start building my own apps and make SAS (Software As a Service).
9. Will concentrate more on blogging, even though it doesn’t pay my bills. It makes me enough money to have my tea and pocket money. But it has bought me opportunities, which other wise wouldn’t be mine.
10. Will start educating my clients about online stuffs.

Recovery Plan
1. Have to take blog migration works soon inorder to cop with my ever increasing bills/expenses.
2. Have to send mail to all my clients, in batches, informing the fiasco! I’m sure they would help me recover.
3. Stop taking minor jobs/works, which take lot of time.
4. Keep working.
5. Stop getting stressed.
6. Stop thinking more about the past, and concentrate on the present.
7 Ask clients to support by referring their friends.
8. Concentrate on health.
9. Make sure to work satisfactorily before moving/taking next client.
10. Stay in touch with clients – start ‘clients only’ news letter. It would be like friendly mails and not sales pitches.

PayPal Rules For Indian Users

How To Open/Create PayPal account ?

This could be the question people might start searching answer for in some months or years time. Because new users may not know all the information needed to open and start making use of PayPal account.

If you are an Indian PayPal user, then you have a different set of rules than PayPal users of other countries.

Here are the basic things to keep in mind while opening a PayPal a/c:
These are mandatory things to have, to open and enjoy the benefits of PayPal a/c.

1. PAN or Permanent Account Number
2. Purpose Code
3. Bank account in India

According to new PayPal rules, you should not keep any balance in your PayPal account for more than 7 days. It should be withdrawn to the bank a/c which is connected with your PayPal a/c with in 7 days, what-so-ever the conversion rates be on those days 🙁

PayPal-auto-withdrawal

PayPal also has auto-withdraw option available for Indian users.
Goto Profile -> Add/Edit Bank Account and click on “Make Auto Withdrawal” button.

Add PAN Number:

paypal-addpan

Your PayPal a/c -> Profile -> My Details -> Click on Add next to PAN.

Add Bank Account:

add-bank-account-paypal

Your PayPal a/c -> Profile -> My Money -> Click on Add my bank next to Bank accounts.

Add Purpose Code:

paypal-addpurposecode

Your PayPal a/c -> Profile -> My Money -> Click on Add next to Purpose Code.

Note: I’m a blogger and freelancer, I have added “Freelance journalism” as my purpose code.

Add Your Current Postal Address:

paypal-add-postal-address

Your PayPal a/c -> Profile -> My Details -> Click on Update next to the Address field.

NOTE: One thing to know clearly is; From now you will not be able to pay for any product, service or anything using the balance present in your PayPal a/c. You should pay only by the credit card that is connected to your PayPal account. i.e., You have to first transfer the balance amount in your PayPal a/c to your Bank Account, and then pay from your Bank Account via your PayPal account! Now you may ask, whats the catch ? This is the rules RBI has set for Indian PayPal users, so we have to follow it.

Related Read:
Withdraw Money From PayPal To Bank Account.
PayPal Button for Accepting Payment For Multiple Products.